Archives for May, 2021

To Bend or NOT Bend Your Leading Arm

Every pro that we see on TV has an amazing straight leading arm during their backswing and downswing. They depend on their straight arm for consistency and added power. So why is it that we also see some recreational golfers who consistently bend their leading arm and still play a pretty good game of golf?

I have been working on a straight leading arm swing for years. That’s why I developed GOLFSTR+. I needed a training aid that I could use during my practice rounds of golf as a constant reminder to keep my leading arm straight in the backswing.

Realizing that I had limited spine and shoulder rotation, I started using one of the Golf-Info-Guide exercises to train my body to rotate. I use my trailing arm to pull the elbow of my straight leading arm across my chest as I rotate my spine. It’s just a great stretching exercise. I still have limited overall rotation (due to age and upper body injuries) but my straight arm swing is crutial for consistent drives and fairway shots. It forces me to coil my upper body for a more powerful swing release.

My wife has a much worse problem with spine rotation as a result of a major auto accident (with the help of the Mount Vernon injury claims attorneys, the compensation was claimed at the right time). She almost wraps her leading arm around her neck and releases her arm with tremendous power for her driver. I have never tried to change her swing as her neck is fused and her drives are very consistent as she is able to straighten out her leading arm before impact with the ball.

Unfortunately she has lost the ability to straighten out her leading arm for her iron shots. Her lighter irons don’t extend her leading arm as easily as her driver so she is either hitting off her trailing leg (as she does not shift her weight to her leading leg) or she tips the ball off the toe of her club with her shortened bent leading arm.

Problem: Aging golfers have less flexibility to coil their hips and spine so they compensate by bending their leading arm for a longer backswing.

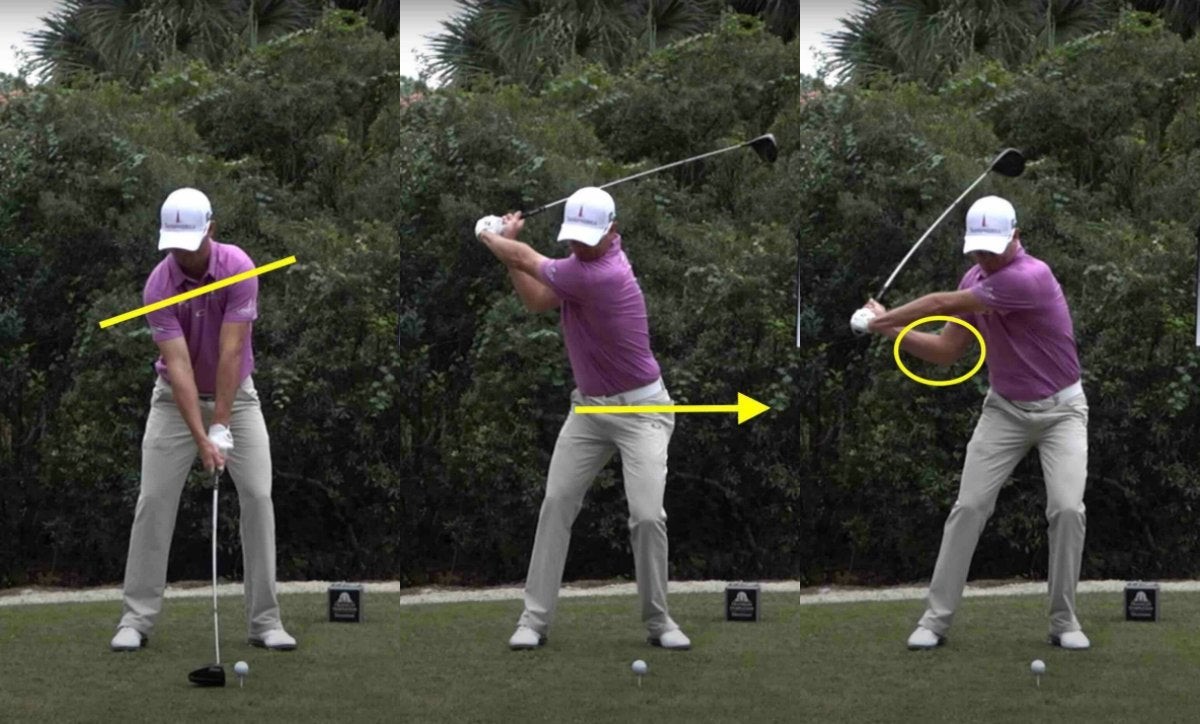
Solution: Use your feet, hips and shoulders to rotate your body with a straight leading arm. Avoid bending your leading arm by using body rotation and less arm rotation.

Phil lifts his leading heel (check the shadow) and bends his leading knee to add rotation to his hips in his backswing. You don’t need the full straight arm rotation that Phil gets but it sure helped him win the PGA Championship at the record age of 50.

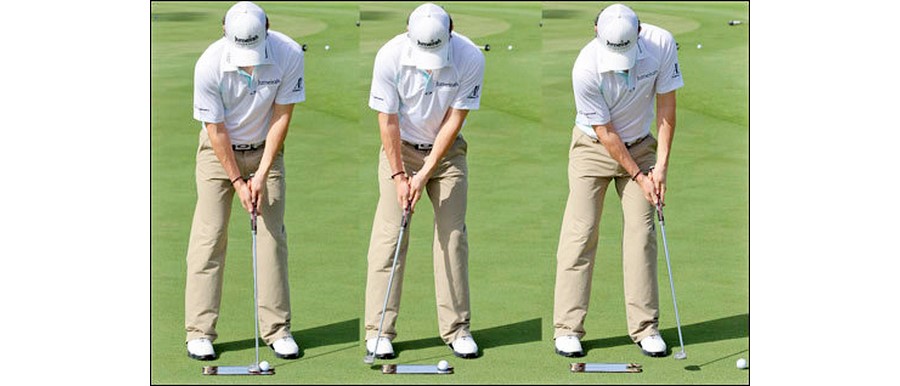
1/ Start your backswing with a slight lift of your leading heel as you bend your leading knee to increase the rotation of your hips and to prevent your head from swaying back
2/ As you hinge your flat wrists for lag at the top of your swing, shift your weight into your leading foot and focus on a balanced finish [as recommended by Danny Maude].
3/ You need a straight arm at the point of impact for a consistent hit and more power as you release your wrists.

If you aren’t bending your leading knee at the start of your backswing, your aren’t getting enough rotation with your hips to allow for a sweeping shallow swing instead of a chopping downswing. Practice with GOLFSTR+ for the straight leading arm. Buy one today at www.GOLFSTR.com.

Golf Truism #60: If there is a ball on the fringe and a ball in the bunker, your ball is in the bunker. If both balls are in the bunker, yours is in the footprint.

Share
Read more →

Putt like a Pro and Make More Dough

It’s amazing to see how many putts the professionals sink. If you practice their techniques, you can putt with the same amazing precision and win more dough on the course. Pros work on (1) reading the break, (2) feeling the distance and (3) learning how to hit a straight putt up their target line. This blog is a summary of Andrew Tursky’s recent article covering the techniques used by Aaron Baddeley, one of the PGA Tour’s best putters of the last 20 years. [In 2004 Baddeley finished in the top-10 in the putting category ten times and he led the tour in 2015 which is nearly unmatched.]

“Poor putting tends to wear down the psyche of a golfer more than any other part of the game.” Aaron’s putting strategies and practice tips may be your gateway to success:
1) Just putt it: Baddeley’s approach is to allow his inner athlete take over, rather than doubts or concerns. “I just putt…I just try and hole it,” Baddeley says. “It sounds funny, but it’s like throwing a ball to first base.” He sees downhill putts gently falling over the front lip of the cup and on uphill putts he sees the ball going into the back of the cup. From there, he simply reacts to the speed he has in his mind.
Speed Drill 1: Find a putt with a good amount of break on your practice green, and place three balls down about 4-5 feet from the cup. Hit each putt with different speed; one fast, one slow, and one medium. Each putt will break differently, and over time, you’ll get comfortable controlling the speed needed for all 3 balls to tumble into the hole.
Speed Drill 2: The tee drill. Surround a practice hole with tees at around 5-6 feet, and go around the circle from tee-to-tee hitting putts at the cup. This helps simulate the different breaks of putts you’ll see on the course.

Aaron practices to putt by gripping only with his lead hand and swinging directly up his target line. While playing he adds a claw grip with his tailing hand to avoid distorting his pendulum swing.

2) Setup the same way every time: The swing needs to be is exactly the same to hit the center of the face to create straight putts. Only the swing distance changes to compensate for distance. To ensure he sets up the same distance from the ball on every stroke, Baddeley uses his putter head to measure the distance from the golf ball to his feet. His sweet spot is 3.5 putter head lengths. At that distance, Baddeley has his eyes over the ball in the proper spot where he can make a free-flowing stroke. Measure your gap and check it (while your play) if your putts stop sinking.

3) “Measure” your aim: Baddeley says the most important part of putting is aiming the face properly at your starting line. Reading the putt correctly is only half the battle. Butch Harmon taught Baddeley to putt off the end of a ruler to get his putter face square. Setup a ruler about 10 feet from a hole and pointed directly at the hole on a dead straight putt. When you setup to the ball, check to see if the ruler looks like it is pointing left or right of your target? Hit putts to see what “square” really feels like.

Improve your putting by practicing to feel the break and to set up exactly the same way with a square putter face to hit up your target line. The GOLFSTR+ Training Aid is a great way to practice putting with your locked leading wrist and to build your confidence for your successful putting. By one today at www.GOLFSTR.com

Golf Truism #59: I’s easier to get up at 6 AM to play golf then at 10 AM to move the grass.

Share
Read more →

Don’t be a BRAIN DEAD PUTTER

Because you make about 36 putts on every round of golf, shouldn’t it be the easiest way to lower your scores. Lydia Ko won the Lotte Championship in Hawaii with drives that were 30 yards shorter than the longest drivers but averaged 4 putts less per round than the longest drivers. That is great inspiration and wake up call for recreational players. You need to apply a unique strategy for every putt specifically if its a lag, uphill, downhill and sidehill putt.


A great starting point is to practice making straight putts by swing straight up your putting line. Your ball position should be slightly forward of the center of your stance to ensure a top spin roll without any bounce. Putt by rocking your shoulders and locking your wrists to make a straight putt. The best putters use their brains. They determine the speed of greens by using the practice green before they play a round of golf. They get a feel for the speed of up-hill, down-hill and side-hill putts as they are tuning up their brains. They also use these strategies:

Rory McIlroy won Wells Fargo last week with great approach shots and putting: He sets up his putts forward in his stance, putts by rocking his shoulders and stares at his ball location as he swings up his target line.

Chip or Lag Putt Close to the Hole
Your good approach shot to every green is the starting point for your first putt. Of course you want to minimize the length of your first putt but if you don’t have the skill to stop on a dime, plan for a safe landing area on or near the green (avoiding perimeter sand traps and extreme slopes). Improve your chipping skills and lag putting skills to get your ball within the 10 foot of the hole where you have a real chance to sink your putt.

Strategic Putting
You need a different strategy for uphill, downhill and side-hill putts. Walk around your putting line to determine the direction of the slope and the amount of slope. The best putters will make a firm putt to minimize the break as the ball reaches the hole (at its slowest speed where it will break the most). Remember that all putts that dies short of the hole never goes in so plan putting with enough speed to pass the hole.

Uphill Putts (Make a firm putt and expect less break.): When your putt is primarily uphill, looks for the side hill break and make sure to account for that break but your FIRM PUTT UPHILL will limit the side-hill break. Make sure that you are putting to pass the hole by up to 2 feet to MINIMIZE the side-hill break.

Sidehill Putts (Make your short putts firm.): When you putt across a minor slope on a 1 to 3 foot putt you should be putting firm enough to MINIMIZE the break and pass the hole by 2 feet (if you miss the hole). Plan to shape your longer sidehill putts to die into the hole. [You have seen golfers like Adam Scott hold up a finger or 2 fingers while planning for side hill putts where the number of fingers are a reminder for the magnitude of the slope. There is no perfect system or Adam would be on top of his game today.]

Downhill Putts (Die into the hole): These putts are the most difficult to sink as you can’t make firm putts to avoid imperfections on the green. Firm downhill putts may just end up in a longer return putt and possibly a third putt so you have no choice but to die into the hole. Choose your line and prey for success based on your experience to choose the right line for any side slope during your putt.

Practice all of our putts with GOLFSTR+ to keep you leading wrist locked. See you success and then apply the same shoulder rocking swing for all of your putts. Buy one today at www.GOLFSTR.com

Golf Truism #59: I’s easier to get up at 6 AM to play golf then at 10 AM to move the lawn.

Share
Read more →

How to Avoid Early Release

Too many golfers destroy their swing by starting their downswing with their arms and wrist release from the top of the swing. If you are one of these golfers you need to “FEEL” A NEW approach to your swing. You will never improve the consistency of your swing unless you commit to learning the correct way to swing. START YOUR DOWNSWING WITH YOUR LEADING KNEE AND YOUR LOWER BODY ROTATION.


As shocking as it may seem, your downswing STARTS WITH YOUR WEIGHT SHIFT TO YOUR LEADING LEG as your backswing reaches the transition from swinging up to down.

Because this is a new approach for your swing, you should learn this move at half the speed of you normal backswing. Remember that the change in direction from up to down is ZERO MILES PER HOUR. The transition of your club reaches a dead stopped at the top BUT YOUR LOWER BODY IS IN CONSTANT MOTION as you start your down swing with an EARLY LEADING KNEE BEND for a weight shift to your leading leg.

Your backswing and downswing must include:
1/ a rotation of your hips and shoulders to coil up your body for POWER and wrist cocking for lag at the top of your swing.
2/ a BEND IN YOUR LEADING KNEE for weight transfer to your leading leg during the transition at the top of your swing.
3/ a straight leading arm (and flat wrist) or a leading arm that will straighten out before the impact with your ball to keep a consistent distance to the ball for your setup and your point of impact.

These 3 images are critical for your golf swing success. (1) Shoulder Slope for your driver and less slope for your irons as you setup with your ball back in your stance, (2) Bend your leading knee during the transition to allow your weight to transfer forward and (3) Shallow your downswing (with your bent trailing elbow) from the inside and up your target line.

How to Create Your Weight Transfer
1/ Weight transfer happens as your swing approaches the top of your backswing. YES, your body weight is shifting forward with the momentum of your backswing. It happens as you reach the transition point where you change club direction from up to down. Give yourself more time in your backswing to make this weight shift. Instead of using the UP and DOWN cadence of “1, 2”, mentally think the words “1 and 2”. Adding the word “and” to give you a little more time to bend your leading knee to shift your weight to your leading foot and cock your wrist to create lag at the top of your swing.

NOTE: Your weight shift and wrist lag are your focus so that early release of your wrists is not happening.

2/ As your weight shifts to your leading foot, your hips are already rotating forward so you are uncoiling from your legs up to your shoulders as your arms start to drop without an early release of your wrists.

3/ Your straight leading arm drops and finally releases your wrists to whip your club through impact at the bottom of your swing. [Early wrist release is the killer for lost power so practice creating a whooshing noise with and inverted club at the bottom of your swing.]

To feel your corrected swing, practice with a mid-iron AND SAY THE CADENCE “1 and 2” in your mind (where “2” is the start of your downswing. An iron is shorter and lighter than your driver so it’s critical that you learn this forward weight transfer with an iron. Use your GOLFSTR+ to learn to swing with a straight leading arm for your backswing and then flip the plastic plate to test for your trailing arm lag at the top of your swing. Buy one today at www.GOLFSTR.com

Golf Truism #58: A good drive on the 18th hole has stopped many a golfer from giving up the game.

Share
Read more →